Happy Thanksgiving everyone!! I hope you have a great day with your family and friends and enjoy the day to reflect on what blessings you have in your life!!
We'll be enjoying our food, watching the Saints kick the Cowboys butt (hurry and enter my giveway!!) and just relaxing.
Will you be going out on Black Friday? I can't because my husband works and I sure do not drag kids out shopping at 4 am.. LOL. Nor do I WANT To fight the crowds..I prefer to shop online! So in honor of that, here are my special coupon codes and deals you can try out! :)
Shop: Mama's Little Monkeys on Etsy
Code: blackfriday
Sale: 15% off any order (ends 11/29/10)
Code: handmadelouisiana
Sale: 15% off any order (ends 12/10/10)
Shop: Badge Reels on Etsy
Code: blackfriday10
Sale: 20% off any order (ends 11/29/10)
Code: handmadelouisiana or cafemomteam
Sale: 15% off any order (ends 12/10/10)
Shop: MicroMops on Etsy
Code: handmadelouisiana or cafemomteam
Sale: 15% off any order (ends 12/10/10)
Code: blackfriday20
Sale: 20% off any order (ends 11/29/10)
Shop: Mama's Little Monkeys on Artfire
Code: blackfriday2010
Sale: Free Shipping on Orders over 5.00 (11/25/10--11/30/10)
Shop: Badge Reels on Artfire 15% off sale Through Monday also!
Code: cafemomteam
Sale: 15% off
Shop: Micro Mops on Artfire
Code: cafemomteam
Sale: 15% off
I hope that's all of them!! Happy Shopping! Be sure to check www.handmadelouisiana.com and http://cafemometsymoms.blogspot.com for more deals from great sellers!

The Hesitant Homeschooler....Mama's Little Monkeys
Showing posts with label cafemom team. Show all posts
Showing posts with label cafemom team. Show all posts
Thursday, November 25, 2010


Monday, October 11, 2010
Impatient Craftaholic Series---Upcycle Baby Shirt Pillows
Helloooooooooo I'm back! It's time for another Impatient Craftaholic tutorial! This is a super fast craft for anyone with even simple sewing skills!
Let's make this little fella!

MATERIALS:
Old baby/kids shirt or onesie.
Sewing Machine (not required)
Thread (coordinating or contrasting the neck hem color)
Hand Sewing Needle
Scissors
Fiberfill
(Helpful links are found within the steps.)
Step One:
Lay out your shirt on your cutting mat. If it's a onesie, you can cut a straight cut at the bottom of the shirt to open the onesie snap seam. Smooth and flatten the shirt so you can line it up as you wish.

Step Two:
Turn the shirt inside out and again smooth it so the design is centered (if you'd like). Pin along the bottom seam so you can keep things even. Don't be frightened if the fabric is a stretchy knit. Tips for sewing knits at the bottom.

Step Three:
Straight stitch (or serge if you have a serger) along the bottom seam. Since this is a finished piece of clothing, you can use the hem stitches already there as a guide if you'd like!


Step Six:
Head for the stuffing!! I love Morning Glory Polyester Fiberfill, but you can use whichever you like.


TIPS FOR SEWING KNITS:
The good thing about this pillow is it doesn't need to be perfect! When sewing with knits here are some tips:
*Pin or clip frequently.
*Use a microtex or ball point needle
*Use a walking foot if the fabric is really thick.
Enjoy!! Feel free to share this tutorial!
~~Amy
Let's make this little fella!

MATERIALS:
Old baby/kids shirt or onesie.
Sewing Machine (not required)
Thread (coordinating or contrasting the neck hem color)
Hand Sewing Needle
Scissors
Fiberfill
(Helpful links are found within the steps.)
Step One:
Lay out your shirt on your cutting mat. If it's a onesie, you can cut a straight cut at the bottom of the shirt to open the onesie snap seam. Smooth and flatten the shirt so you can line it up as you wish.

Step Two:
Turn the shirt inside out and again smooth it so the design is centered (if you'd like). Pin along the bottom seam so you can keep things even. Don't be frightened if the fabric is a stretchy knit. Tips for sewing knits at the bottom.

Step Three:
Straight stitch (or serge if you have a serger) along the bottom seam. Since this is a finished piece of clothing, you can use the hem stitches already there as a guide if you'd like!

Step Four:
Sew a straight stitch (or serge) along the open ends of the sleeves. You are sewing up all openings EXCEPT the neck. So now you have an inside out, nearly sewn up pillow!

Step Five:
Flip your shirt right side out and push out your corners and seams.

Step Six:
Head for the stuffing!! I love Morning Glory Polyester Fiberfill, but you can use whichever you like.

Begin stuffing the shirt through the open neckhole.

Step Seven:
Continue stuffing the "body" of the shirt with fiberfill, filling to the size you want...whether you want a thin vs. thick pillow. Be sure to sort of fluff the fiberfill before you shove it in the shirt or it will bind up and make little balls. Stuff and fluff to the desired size of your pillow. Be sure to stuff the little arms too!


Step Eight:
So now you have a stuffed pillow with an open neckhole. Here is where you need to hand sew the opening closed. Thread your needle. Hand sew your neckhole, shoving the fiberfill in so it doesn't catch in the needle and thread as you sew. You can grasp the neckhole closed with your hand, or by pinning it. The type of stitch you use is up to you. I used a blanket stitch. You can find more stitches here.
I used a contrasting thread that matched the body of the shirt but added some color to the neckhole. You choose your thread!

That's it, you're done!! You've just sewn a baby shirt pillow in no time flat! Even with hand sewing and stuffing I made this pillow in less than 30 minutes!
This pillow was a onesie with long sleeves! I cut off the longer sleeves and cut a straight line at the bottom for my hem!

TIPS FOR SEWING KNITS:
The good thing about this pillow is it doesn't need to be perfect! When sewing with knits here are some tips:
*Pin or clip frequently.
*Use a microtex or ball point needle
*Use a walking foot if the fabric is really thick.
Enjoy!! Feel free to share this tutorial!
~~Amy
Thursday, September 9, 2010
Sensory Tag Blanket--Impatient Craftaholic Series
Let me share an evil word in the handmade industry...
TAGGIES.
Boo, Hiss, MEOW! What are Taggies? Taggies is a company that makes tag blankets..you know those blankets our grandma's made? Well, they copyrighted it, as of course they have every right to do so. I most certainly do not begrudge anyone their right to the almighty dollar and I am a big fan of capitalism. But the copyrights these owners have on Taggies is INSANE. They want to copyright EVERY blanket with four sides and looped ribbons. They even want to copyright pretty much any fabric with looped ribbons inside. I have had EVERY ITEM I made with looped ribbons pulled off Etsy, Artfire, and other venues because of the lawyers for the Taggie company. Do they have the right to do so, Sure. Do I have to like it? NOPE.
So here you go my friends, since they say I can't sell any blankets with tags in them (which by the way Mrs. Taggies, you should probably call up WAL-MART because they sell tag blankets too. Oh wait, you only go after small time moms at home.) Anyways, since I can't sell mine...I'll share with you how to MAKE your own.
MATERIALS:
Two fabrics (I used Flannel and Minky)
Ribbons to coordinate or contrast your fabrics
Scissors
Cutting Mat or Surface
Thread
Lighter/Flame/Candle

Step One:
Choose the size of your blanket. You may want a large blanket or just a small lovey. Whatever size you choose, put your fabrics right sides together and cut them the SAME size/shape.

Step Two:
Gather your ribbons. The type is up to you, grosgrain, satin, solids,etc.

Step Three:
Cut your ribbons to approximately 4-5 inches long.

Step Four:
I like to then lay out my ribbons to see where I want to place them along the edges of the blanket. Rearrange them to your liking.

Step Five:
Now take your ribbon and FOLD it (not making a hard crease, just a gentle fold) with the pattern on the OUTSIDE where it's visible.

Step Six:
Now take the RAW EDGE of your ribbon and insert your ribbon (Still folded) in between the fabric while it's right sides together.

Now your raw edge of the ribbon and the raw edge of the fabrics LINE UP. Pin to keep it straight.

Step Seven:
Now continue this all the way around the edges of the blanket, using the pattern you wanted for the ribbon placement.

Step Eight:
Now head to your sewing machine! You will choose a starting point on your blanket, and remember that you are TURNING and TOP STITCHING this blanket, so you'll be leaving an opening large enough to turn the fabrics right side out. Where you start/finish your opening is up to you.

I prefer a walking foot because I am using minky. But you can use a regular foot, particularly if you are using cottons/flannels, etc. If using stretchy fabrics you should use a ballpoint or Microtex needle.
Step Nine:
Sew along the edge of the blanket in a straight stitch, turning when you get to the corner. You should stop roughly 2 inches from your starting point so you have room to turn the blanket.

Step Ten:
Now you'll need to turn your blanket right side out.

Step Eleven:
Once your blanket is turned right side out, gently tug on all your ribbons to assure they are secure. This also helps gently pull the seams straight. You can iron your blanket at this point, although I did not iron this blanket because you should NOT iron minky.
Once your blanket is smooth, head back to the sewing machine to sew your top stitching.

Step Twelve:
Continue straight stitching (or zigzag, or even decorative stitch if you wish) all the way around the edge of the blanket, making sure you go over the opening you turned your blanket in. If you used a walking foot, you'll need to use a regular foot to backstitch your seams because you should not backstitch with a walking foot.
VIOLA! You have a beautiful taggy blanket!

Step Thirteen:
Now for the clincher....The Taggies company will hunt you down if you SELL a blanket like this. BUT last I checked, their patent does NOT cover if the ribbons are not looped. And quite honestly for my own protection, I'd prefer not to sell a blanket with looped ribbons anyway due to the risk of babies fingers getting stuck in them.
So what to do, what to do? EASY. CUT the loop on the ribbon and HEAT SEAL the edges!!

 There you go! Now you have a cool sensory tag blanket and you did not break their patent! Naturally, before you make the blanket if you plan on cutting and heat sealing, you can do that before you make the blanket, but I was showing you both options.
Feel free to ask any questions and share this tutorial, but please give me a link back! :) Check out my other tutorials in the left hand side bar!
Enjoy!
TAGGIES.
Boo, Hiss, MEOW! What are Taggies? Taggies is a company that makes tag blankets..you know those blankets our grandma's made? Well, they copyrighted it, as of course they have every right to do so. I most certainly do not begrudge anyone their right to the almighty dollar and I am a big fan of capitalism. But the copyrights these owners have on Taggies is INSANE. They want to copyright EVERY blanket with four sides and looped ribbons. They even want to copyright pretty much any fabric with looped ribbons inside. I have had EVERY ITEM I made with looped ribbons pulled off Etsy, Artfire, and other venues because of the lawyers for the Taggie company. Do they have the right to do so, Sure. Do I have to like it? NOPE.
So here you go my friends, since they say I can't sell any blankets with tags in them (which by the way Mrs. Taggies, you should probably call up WAL-MART because they sell tag blankets too. Oh wait, you only go after small time moms at home.) Anyways, since I can't sell mine...I'll share with you how to MAKE your own.
MATERIALS:
Two fabrics (I used Flannel and Minky)
Ribbons to coordinate or contrast your fabrics
Scissors
Cutting Mat or Surface
Thread
Lighter/Flame/Candle

Step One:
Choose the size of your blanket. You may want a large blanket or just a small lovey. Whatever size you choose, put your fabrics right sides together and cut them the SAME size/shape.

Step Two:
Gather your ribbons. The type is up to you, grosgrain, satin, solids,etc.

Step Three:
Cut your ribbons to approximately 4-5 inches long.

Step Four:
I like to then lay out my ribbons to see where I want to place them along the edges of the blanket. Rearrange them to your liking.

Step Five:
Now take your ribbon and FOLD it (not making a hard crease, just a gentle fold) with the pattern on the OUTSIDE where it's visible.

Step Six:
Now take the RAW EDGE of your ribbon and insert your ribbon (Still folded) in between the fabric while it's right sides together.

Now your raw edge of the ribbon and the raw edge of the fabrics LINE UP. Pin to keep it straight.

Step Seven:
Now continue this all the way around the edges of the blanket, using the pattern you wanted for the ribbon placement.

Step Eight:
Now head to your sewing machine! You will choose a starting point on your blanket, and remember that you are TURNING and TOP STITCHING this blanket, so you'll be leaving an opening large enough to turn the fabrics right side out. Where you start/finish your opening is up to you.

I prefer a walking foot because I am using minky. But you can use a regular foot, particularly if you are using cottons/flannels, etc. If using stretchy fabrics you should use a ballpoint or Microtex needle.
Step Nine:
Sew along the edge of the blanket in a straight stitch, turning when you get to the corner. You should stop roughly 2 inches from your starting point so you have room to turn the blanket.
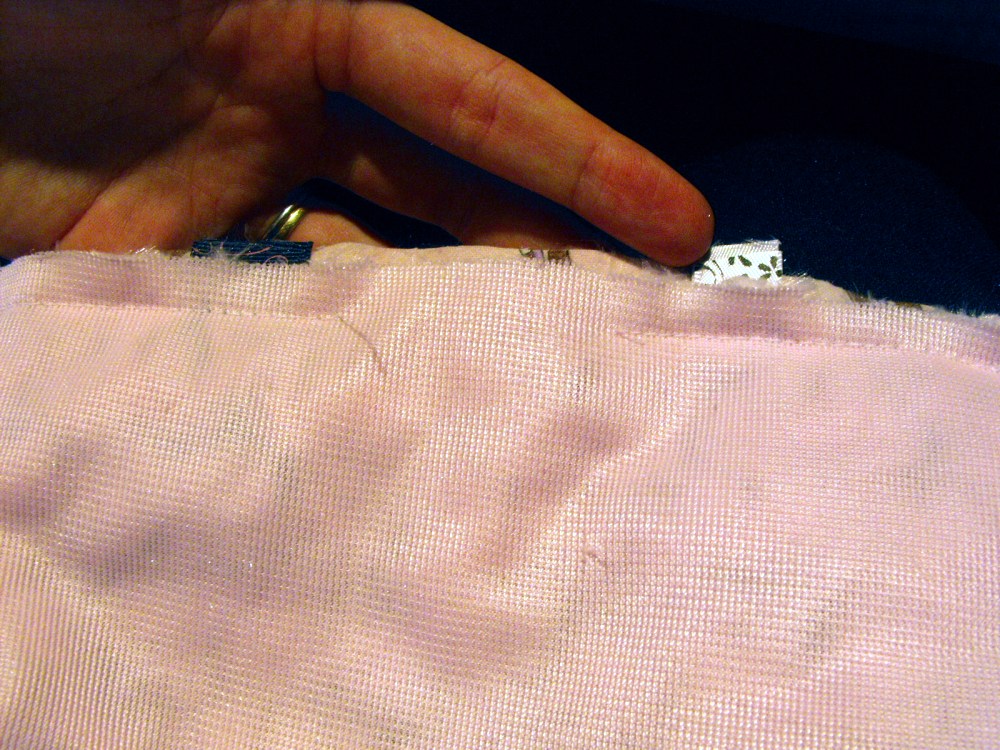
Step Ten:
Now you'll need to turn your blanket right side out.

Step Eleven:
Once your blanket is turned right side out, gently tug on all your ribbons to assure they are secure. This also helps gently pull the seams straight. You can iron your blanket at this point, although I did not iron this blanket because you should NOT iron minky.
Once your blanket is smooth, head back to the sewing machine to sew your top stitching.

Step Twelve:
Continue straight stitching (or zigzag, or even decorative stitch if you wish) all the way around the edge of the blanket, making sure you go over the opening you turned your blanket in. If you used a walking foot, you'll need to use a regular foot to backstitch your seams because you should not backstitch with a walking foot.
VIOLA! You have a beautiful taggy blanket!

Step Thirteen:
Now for the clincher....The Taggies company will hunt you down if you SELL a blanket like this. BUT last I checked, their patent does NOT cover if the ribbons are not looped. And quite honestly for my own protection, I'd prefer not to sell a blanket with looped ribbons anyway due to the risk of babies fingers getting stuck in them.
So what to do, what to do? EASY. CUT the loop on the ribbon and HEAT SEAL the edges!!


Feel free to ask any questions and share this tutorial, but please give me a link back! :) Check out my other tutorials in the left hand side bar!
Enjoy!
Thursday, August 5, 2010
Back to School Shopping Time!!
Hey gang! I thought I'd share some of the fab back to school sales from my friends!
10% Off at Aunti Franni's!
Custom Embroidery and more!
Check out this cute Cheer USB/Chapstick Case for your little cheerleader!

The Beaded Branch is also having a 10% off sale! Maybe you need something pretty for YOURSELF to go back to teaching, or a special gift for that special teacher in your life? Check out this beautiful choker:

CNewcomb is having a 10% off sale also with his nifty woodwork pieces. Keychains, wall hangings and more! This cute Wall Hanging would be great in your classroom, or you child's room.

My own Artfire shop,, Mama's Little Monkeys is having a 10% off sale! Back to school ponytails, badge reels for teachers/staff, cleaning supplies, and more!

One of my other personalities, Badge Reels is having a Free US Shipping on EVERYTHING through the month of August :) Also now on Artfire with a 30% off sale!!

My Cafemom Teammate Jonie at Childish Thoughts is having a sale also! For the whole month of August, 20% off all items. Refunded after payment or wait for revised invoice. You'll find crayon and car rolls, backpacks, clothes and more!
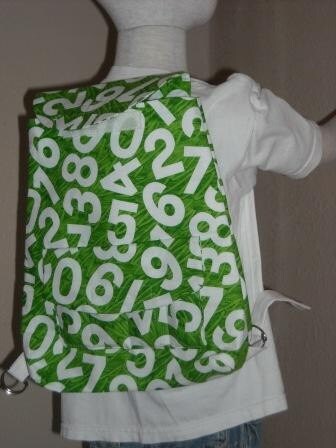
Two Sugar Peas is having a BACK TO SCHOOL SALE!!! 10% off all orders over $25 and 15% off all orders over $50. Discount dose not apply to shipping and will be refunded by Paypal within 24 hours of ordering.

Free Shipping through the month of August in Hooked Keepsakes Check her out for crochet goodies!


Jodie Flowers has a special: Buy 2 patches and get the 3rd surprise patch for Free!! Same with the book bugs - Buy 2, get the 3rd surprise bug for FREE! :)
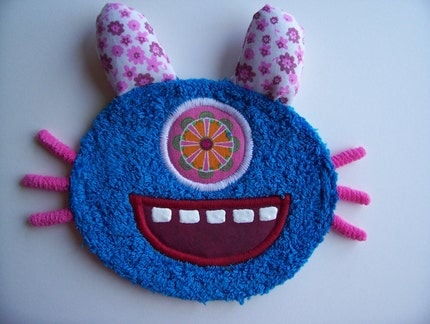
Over at NOEmpire, Orders of $25.00 or more have free US shipping

.
Over at Hailey's Beads and Bows You'll find www.HaileysBeadsAndBows.com
15% off entire purchase (use code HBB15 at checkout). Free gift with every purchase when they mention HML in notes to seller.
Check out these super cute locker magnets from

All Crayon Roll $5
All locker magnets 20% off
Now until August 14th!
So Happy School Year Everyone! :)
~~Amy
Saturday, April 3, 2010
My Faves: Flowers
Wool Felt Flower Magnet by TwoKazoos
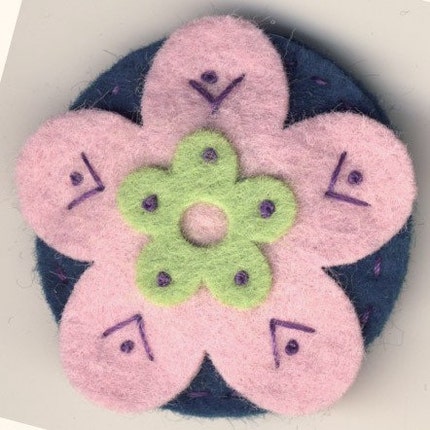


Take time to stop and smell the flowers!
Satin Purple Hair Flower Clip by Love to Stamp
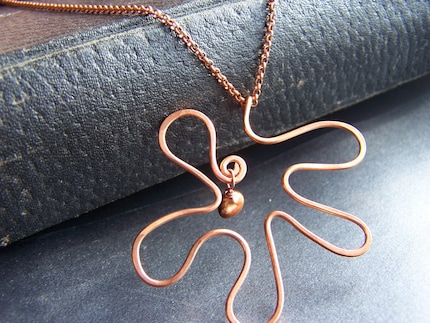
Handformed copper flower with bronze freshwater pearl by KatherinesCreations
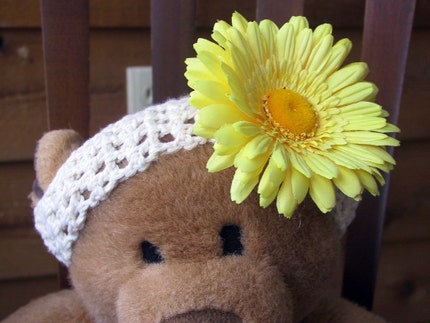
Cotton Crochet Headband with Flower by StitchesinCotton
Echinacea (Purple Coneflower) Seeds by Gabrielle's Garden
Take time to stop and smell the flowers!
Tuesday, January 5, 2010
One Door Closes, Another Opens
Because this is my year of Operation Simplify, I have made the decision to put Fleur De Ink on an extended vacation. I'm hoping the powers that be at Etsy don't REALIZE it's an extended vacation (and I suspect they won't) because I want to keep the shop, in hopes that one day it can be reopened. But as of now, my other shops are keeping me busy enough and flower pens just aren't high on the priority list!
Why? Eli. That's why. My baby boy was bringing me a sock monkey jack in the box this morning and saying "Socky". (which means he wants me to push it down so he can make it pop up). But I was trying to send an email to a customer about flower pens.
Really? Flower pens are NEVER EVER more important than Socky with Eli. In fact just about NOTHING is more important than that.
Eli is my opening door. The chance to save him is there.

Eli has autism. Plain and simple. Yes, he's very high functioning and has great potential to be mainstreamed just fine one day. Yes, he's not even 2 yet (Jan 23!!) but it is there. Yes, he's done awesome being Gluten Free and I think one day we'll barely notice anything was wrong. But what if I don't capitalize on the improvements he's making now? What if I push "Socky" aside to do my work? That's not a risk I'm willing to take because my REAL work is being a mommy to two beautiful boys. And although Harrison is in school, he has his own unique needs and sensory issues that will likely escalate as he gets older.
So, I decided (several weeks ago) some things have to give. One being Fleur De Ink. I'll still gladly make them for friends, gifts, and myself, but there is no need to run a full shop around them. I continue to run Mama's Little Monkeys, Amelia Amos and Destash City because I do love doing it, and there is immense pleasure in having something that is ALL mine and NOT mommy related. And thus far, those shops are easily managed with the time I have.
Now I will not be updating, adding to, or what not to them as frequently as in the past. 3 Etsy shops, 2 Artfire shops and 2 Hyena Carts are a lot! Thankfully, they're all mostly full of ready to ship items, or easy to make items. Steamlining is my goal here this year!
And let's be honest, if I didn't get a free account with Artfire and have already paid for Destash City for 2010 I'd probably bail on Artfire. As much as I love the people, the sales just aren't there. But I plug away because I enjoy writing for Handmade News and I'll make the most of my time there best I can.
My teams are also important to me, but thankfully I have very understanding members and friends who are awesome at making the teams the best they can be! Most are also mommies and understand how life is! So remember to search "Cafemom Team" and "HandmadeLouisiana" on Etsy.com! :)
I create and sell handmade because I enjoy it but there is also a business side. If this does not make a profit for our family--in this much needed time, I'll pull the plug in a heartbeat and do what I have to do. So far, it's going good and I'm finding a nice steady rhythm of sales/fun/management. But if the cause was there, I'd turn it all in for my family in a heart beat....and just sew for me! :)
Besides, if things do get really bad, at least I'll have fabric to keep us warm and soap to keep us clean!!
So if you want any of my flowery prettiness, hop on over to Fleur De Ink because after Jan 8th, it's going on vacation for awhile!!
But you can always find me at my other shops--for now!
~~mama
Why? Eli. That's why. My baby boy was bringing me a sock monkey jack in the box this morning and saying "Socky". (which means he wants me to push it down so he can make it pop up). But I was trying to send an email to a customer about flower pens.
Really? Flower pens are NEVER EVER more important than Socky with Eli. In fact just about NOTHING is more important than that.
Eli is my opening door. The chance to save him is there.
Eli has autism. Plain and simple. Yes, he's very high functioning and has great potential to be mainstreamed just fine one day. Yes, he's not even 2 yet (Jan 23!!) but it is there. Yes, he's done awesome being Gluten Free and I think one day we'll barely notice anything was wrong. But what if I don't capitalize on the improvements he's making now? What if I push "Socky" aside to do my work? That's not a risk I'm willing to take because my REAL work is being a mommy to two beautiful boys. And although Harrison is in school, he has his own unique needs and sensory issues that will likely escalate as he gets older.
So, I decided (several weeks ago) some things have to give. One being Fleur De Ink. I'll still gladly make them for friends, gifts, and myself, but there is no need to run a full shop around them. I continue to run Mama's Little Monkeys, Amelia Amos and Destash City because I do love doing it, and there is immense pleasure in having something that is ALL mine and NOT mommy related. And thus far, those shops are easily managed with the time I have.
Now I will not be updating, adding to, or what not to them as frequently as in the past. 3 Etsy shops, 2 Artfire shops and 2 Hyena Carts are a lot! Thankfully, they're all mostly full of ready to ship items, or easy to make items. Steamlining is my goal here this year!
And let's be honest, if I didn't get a free account with Artfire and have already paid for Destash City for 2010 I'd probably bail on Artfire. As much as I love the people, the sales just aren't there. But I plug away because I enjoy writing for Handmade News and I'll make the most of my time there best I can.
My teams are also important to me, but thankfully I have very understanding members and friends who are awesome at making the teams the best they can be! Most are also mommies and understand how life is! So remember to search "Cafemom Team" and "HandmadeLouisiana" on Etsy.com! :)
I create and sell handmade because I enjoy it but there is also a business side. If this does not make a profit for our family--in this much needed time, I'll pull the plug in a heartbeat and do what I have to do. So far, it's going good and I'm finding a nice steady rhythm of sales/fun/management. But if the cause was there, I'd turn it all in for my family in a heart beat....and just sew for me! :)
Besides, if things do get really bad, at least I'll have fabric to keep us warm and soap to keep us clean!!
So if you want any of my flowery prettiness, hop on over to Fleur De Ink because after Jan 8th, it's going on vacation for awhile!!
But you can always find me at my other shops--for now!
~~mama
Monday, January 4, 2010
Spotlight on SOCK MONKEYS!
Ya'll know I love all things sock monkey!! Enjoy this little collection of some awesome sock monkeys!
Wednesday, December 30, 2009
My Faves: Violet
Purple is one of my fave colors...I sense I'll be making more spotlights featuring purple!
Monday, December 28, 2009
Saturday, December 26, 2009
My Faves: Brown and Neutrals
I'm trying to get back to doing my fave things posts!! This week, Browns and Neutrals!! Enjoy!
Enjoy!
Friday, September 11, 2009
Sisterhood of the Traveling Sock Monkeys
Some sock monkey friends and I were chatting and we decided to create our Sisterhood of the Traveling Sock Monkeys. I purchased three pairs of the same socks, sent them to my lovely friends Crystal and Rebecca and we got to sewing! Our goal was to show that although many handmade artisans can make the same thing, everyone is unique and every artisans deserves respect!
So I give you, the Sisterhood of the Traveling Sock Monkeys:
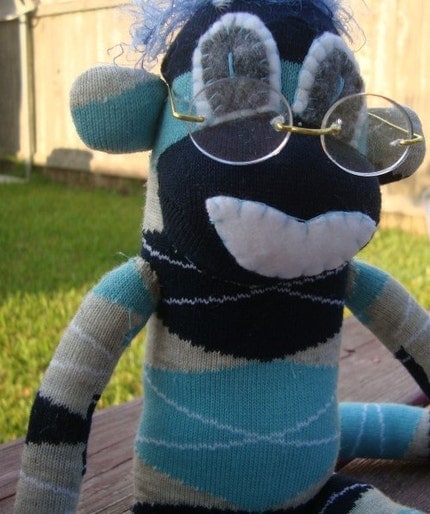
I created Thelma, a sweet older monkey who enjoys reading.
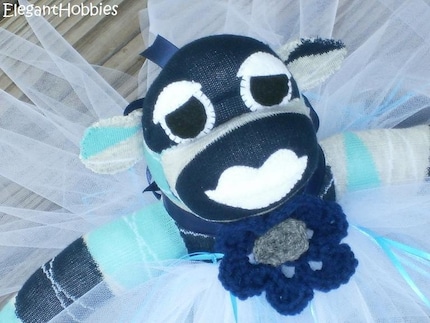
Crystal created Brenda, a beautiful dancing monkey!
And Rebecca created Rosalyn, a snow loving monkey!

Won't you give these super cute monkeys a home? The sisters are sweet monkeys, we promise. Just watch your bananas....
~~Amy
Subscribe to:
Posts (Atom)
LinkWithin
